Reverse Applique Quilt Block Tutorial

In honor of the Something New Sampler Quilt Along, I’ve put together a quick tutorial to teach you how to make reverse applique circles. This quilt block is not scary (I promise!), but it’s actually really easy and fun.

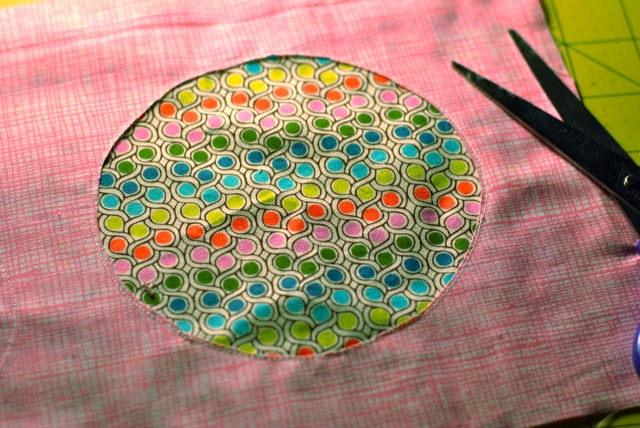
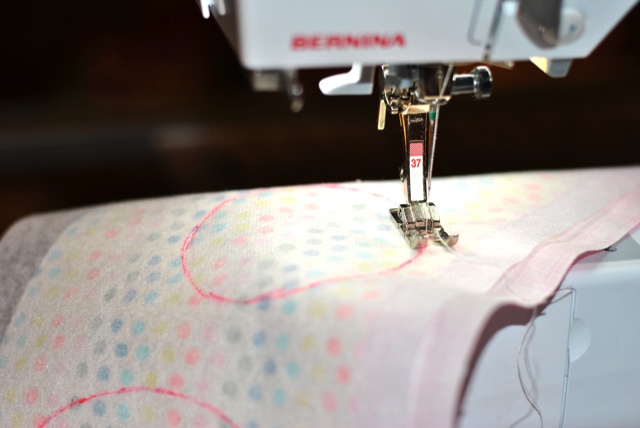
Unlike regular old applique, the fabric you choose for your appliqued shapes actually peeks through the background of the block, rather than being stitched to the top of it. This creates a cool dimensional effect, and adds interest to your quilt block. You can use this technique to reverse applique any shape, or add reverse applique to a T-shirt, and home decor projects and more! Let’s get started.

 
You’ll Need:

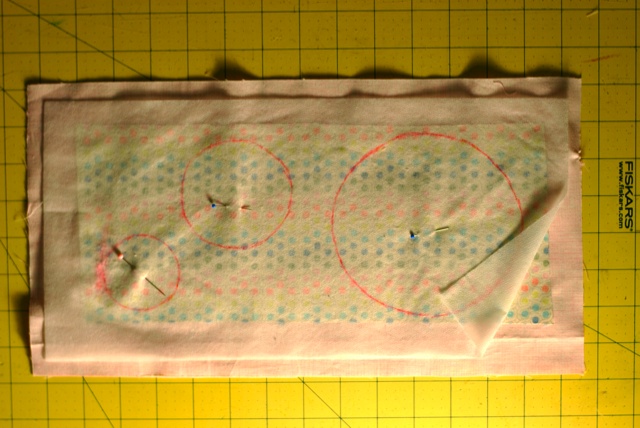
– 7.5″ x 14.5″ piece of background fabric (pink)
– 7.5″ x 14.5″ piece of lightweight fusible (on one side) iterfacing
– 7.5″ x 14.5″ piece of fabric for the circles, or scraps of different fabrics.
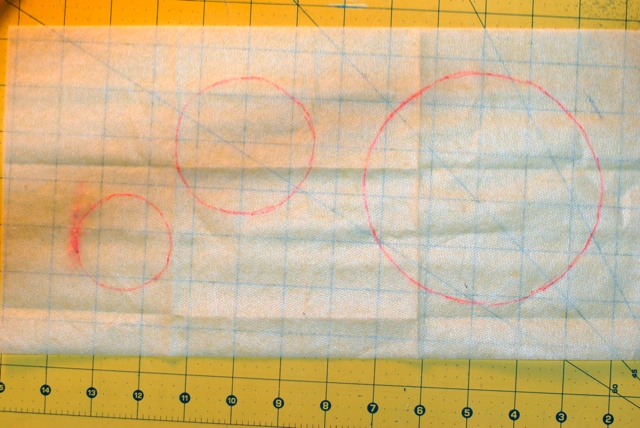
– A pen and some circular objects to trace
– Sewing machine, thread and scissors

Block Size: 7.5″ x 14.5″ unfinished (7″ x 14″ finished… were going funky here!)

To get started, find some circular objects in your house and trace them to make a design. The top of a jar, a roll of tape, or any old object will work. 
Place your piece of fusible web in front of you, with the fusible side down. Next, use a pen to trace the circles directly onto your fusible web, onto the smooth, non-fusible side.  
Note: If you’re tracing a shape that’s not symmetrical (like a word), you’ll need to trace it onto the fusible side of your interfacing (the one with the dots). You can print out a copy and place it behind your fusible interfacing, for tracing purposes. Sweet Verbena gives an alternate method of printing out a design on your computer, cutting it out and tracing the design backwards.
Next, place the fusible side of your interfacing against the wrong side of your applique fabric. It’s okay if the fabric is a bit smaller than your interfacing, as long as all of the circles are covered. If you are using scraps of different fabrics, just make sure they are wide enough to extend beyond the edges of your traced circles. Press with your iron.
Place the right side of your applique fabric (for me, the rainbow dots) face down onto to the wrong side of your background fabric (pink). Pin in place.
This is what your block should look like from the front, with both right sides of fabric showing when you peel back the corner.
Take your design over to the sewing machine, and place the interfacing side up. Stitch along your pen-marked lines from earlier, and trim the threads.

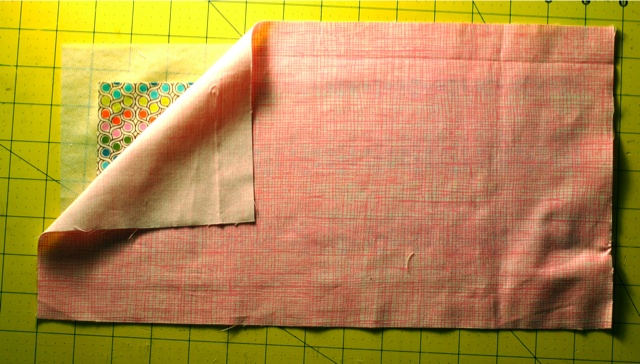
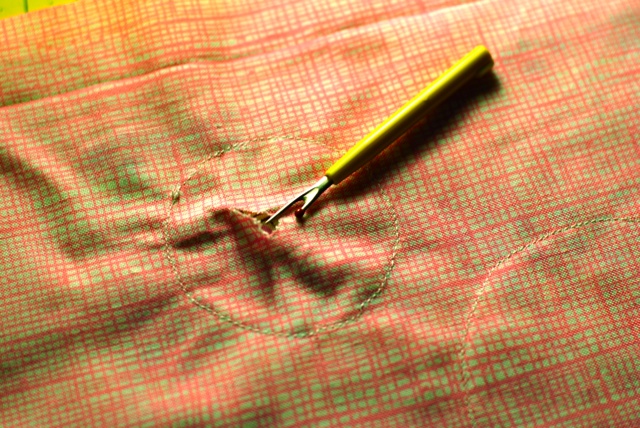
From behind the quilt block, pinch the back layer of fabric with your fingers. Use your seam ripper to poke a hole into the center of the front layer of fabric (into the center of your stitched circles), making sure not to poke through the back layer of fabric or interfacing.

Use your scissors to cut into each circle and trim away the excess fabric as pictured, leaving a 1/8″ seam allowance from the stitched outline.

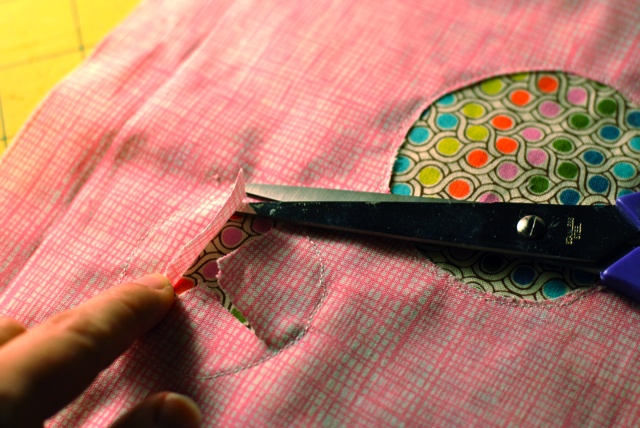
Flip over the quilt block to the back, and carefully trim away the excess fabric and interfacing around the stitched shapes to remove excess bulk.

Reverse Applique Quilt Block

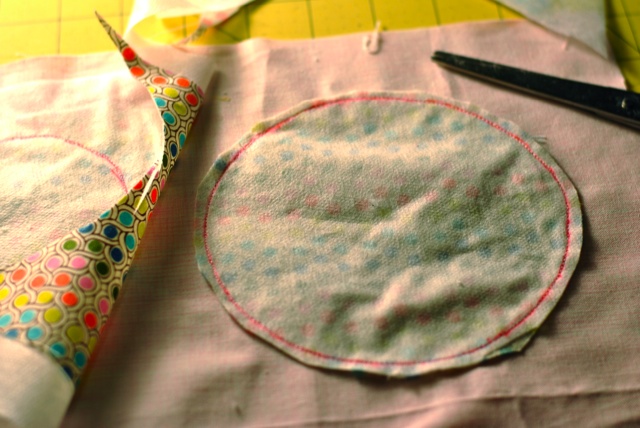
Here’s the completed quilt block! Have fun arranging the circles as you’d like or creating your own unique design.

Follow Along!

Jan 14th 
Amy @ thecutelifesmiles.blogspot.com | Bargello piecing

Jan 21st
Heidi @ buttonsandbutterflies.com | folding
Chelsea @ pinsandbobbins.blogspot.co.uk | a scraptastic technique


Jan 28th
Lindsay @ lindsaysews.com | reverse applique


Feb 4th
M-R @ quiltmatters.blogspot.com | trapunto
Heidi @ fabricmutt.blogspot.com | cathedral windows


Feb 11th
Alyssa @ pileofabric.com | pinless curves
Becky @ myfabricobsession.blogspot.com | machine applique
And stop by the cute life on Fridays for tips and tutorials on how to set these rectangular blocks! Be sure to join the flickr group to keep up with the hop, the chatter, and some inspirational photos.

Prizes!
At the end of the quilt along, link up a blog post or Flickr photo with anything you’ve done from the sampler series, even if it’s just one block! There are two categories for prizes:
1) Finished projects: Winners will be chosen by popular vote. “Finished” includes an entirely completed smaller project, like a pillow, table runner, mini quilt, etc. Pieced quilt tops also count as “finished”, even if not quilted.
2) Participation prizes: Winners will be chosen by a random number generator. Link up any progress you’ve made!

something new sampler header


Craft Buds and My Shop


Image transfers revisited
: Cyndi’s readers never seem to get tired of discussing image transfers in their work! 

ACreativeDream:

Shrinky Dinks… suddenly the most popular post on June’s blog… thanks to Pinterest. 


Color My Roving
: The Crafty Princess is still in love with her spindle and adding a dash of color to her yarn making affairs.  


How to Make Mixed Media Butterfly Tags to Add Sparkle to Any Gift
:
The right tools make these pretty gift tags look like they they took
hours to make. Thank you Xyron, Cuttlebug, and Tim Holtz!  


Message Board – Kinda
: Cherie combines a bunch of things laying around to create board for some pictures. That was the plan, anyway.


Craftside-A behind-the-scenes peek at our crafty world:

This week at Craftside there is a crochet crown
lace pattern, tutorials on how to transfer designs to skin and mold
caramels using flexible ice cube trays and a pretty photo of an
interesting style of lingerie. 

HELLO!

I’m Lindsay Conner, and welcome to my sewing home! I am a modern quilter, author, editor, pattern designer, wife, and mom. I use this space to share my latest projects, tutorials, and patterns!

CONTRIBUTING TO

STAY IN TOUCH